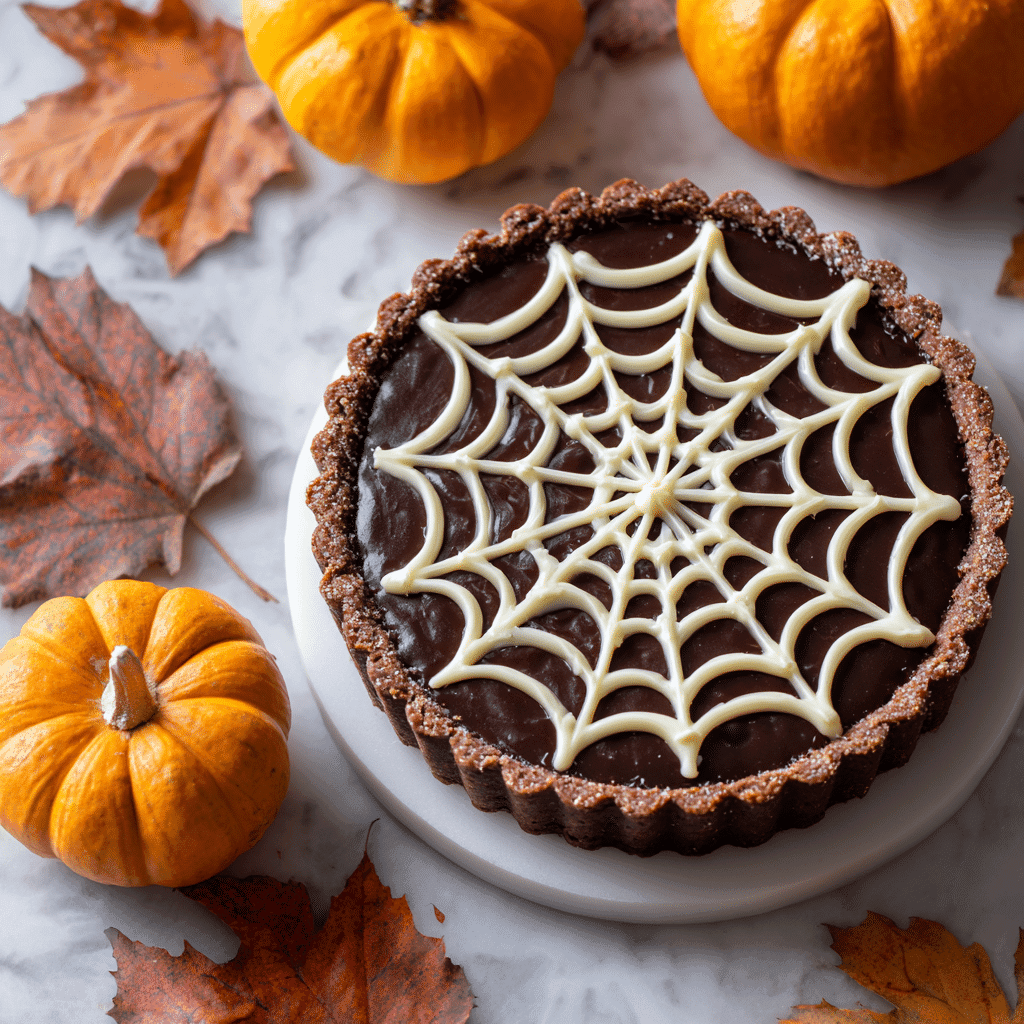
As soon as the leaves start to crunch underfoot and cinnamon candles fill the kitchen, I know it’s time to bake something special. This Spiderweb Chocolate Tart is one of those recipes that just screams October magic. It’s my go-to every Halloween season a silky chocolate tart with a spooky white chocolate spiderweb design that’s surprisingly simple to make.
My love for this tart started in a tiny café in Vienna, just as fall rolled in. The owner an old friend of my grandmother’s served it to us on a misty afternoon, and I’ve been recreating it ever since. It’s festive, crowd-pleasing, and honestly so much fun to decorate. Whether you’re hosting a Halloween bash or just cozying up at home, this tart is your delicious excuse to lean into the season.
If you’re already planning your spooky menu, you’ll want to save these Jack-O-Lantern Omelets and Black Cat Waffles too!
Print
Spiderweb Chocolate Tart
- Total Time: 35 minutes + chilling
- Yield: 1 9-inch tart
Description
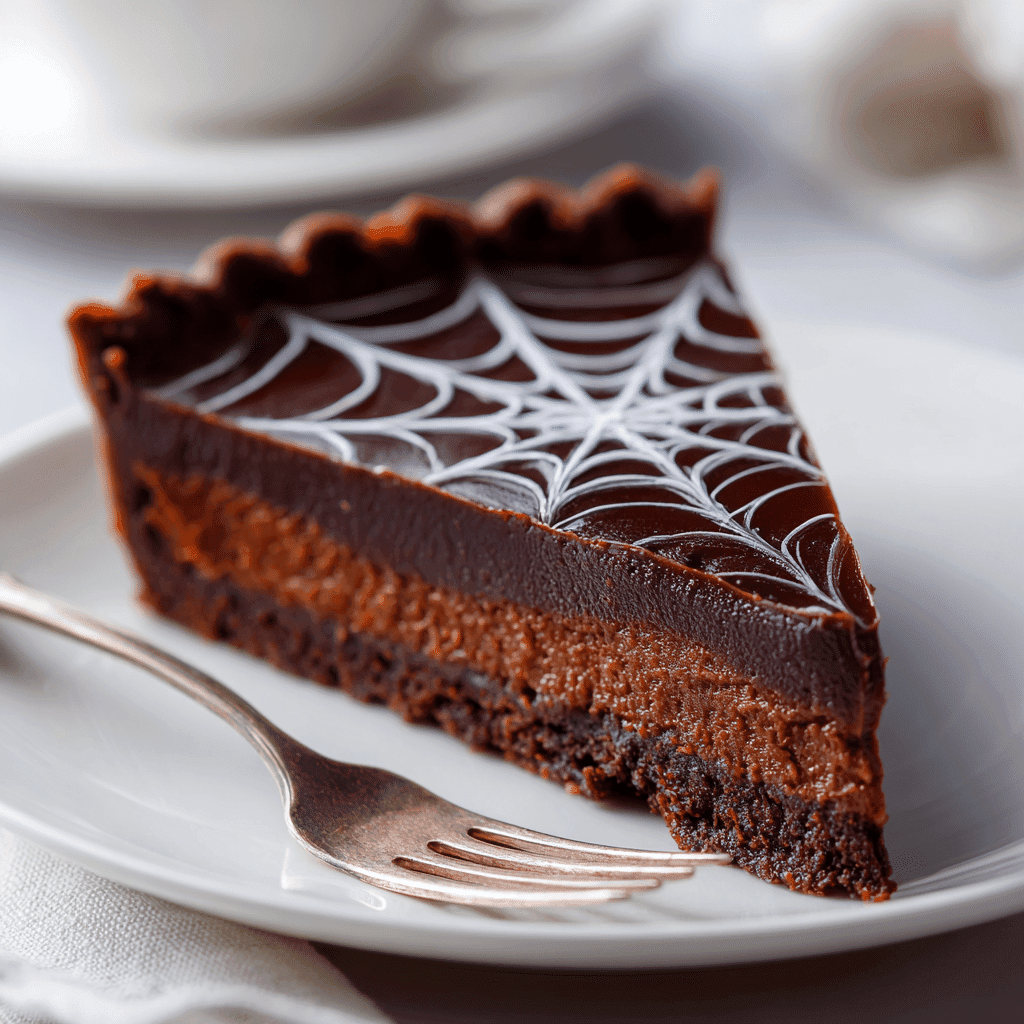
Silky, rich, and spooky this Spiderweb Chocolate Tart is the ultimate Halloween dessert. A dark chocolate filling rests in a cookie crust, topped with a white chocolate spiderweb that’s fun to create and even more fun to eat.
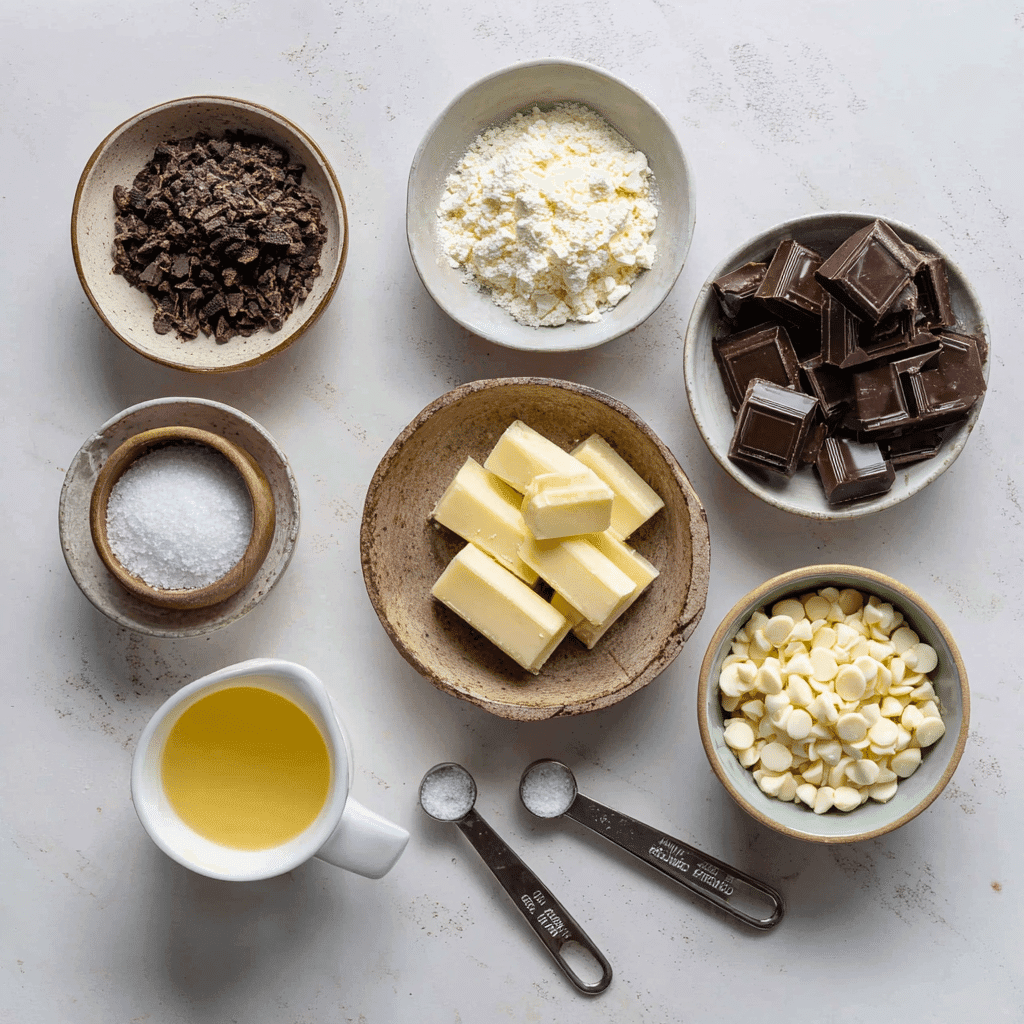
Ingredients
- 1 ½ cups crushed chocolate cookies (Oreos or chocolate graham crackers)
- ¼ cup melted butter
- 2 tablespoons brown sugar
- 1 cup heavy cream
- 200g dark chocolate, chopped
- 1 teaspoon vanilla extract
- 1 tablespoon maple syrup or honey
- ¼ cup white chocolate chips
- 1 teaspoon coconut oil
- Optional: candy spiders, pinch of flaky salt, Halloween sprinkles
Instructions
- Preheat oven to 350°F (175°C). In a bowl, combine crushed chocolate cookies, melted butter, and brown sugar.
- Press the crust mixture into a 9-inch tart pan. Bake for 8–10 minutes. Let cool completely.
- Heat heavy cream in a saucepan until just simmering. Pour over chopped dark chocolate. Let sit for 2 minutes, then stir until smooth.
- Add vanilla and maple syrup to the chocolate mixture. Stir until fully combined and silky.
- Pour the filling into the cooled crust. Tap to release bubbles and smooth the top. Chill for at least 2 hours until set.
- Melt white chocolate chips with coconut oil. Transfer to a piping bag or zip-top bag with a small snip at the corner.
- Pipe circles from center outward, then use a toothpick to draw lines from center to edge to create the spiderweb design.
- Garnish with candy spiders, flaky salt, or Halloween sprinkles. Slice with a hot knife for clean cuts. Serve chilled.
Notes
Use high-quality dark chocolate (60–70%) for best results. Always let the tart fully chill before decorating. For cleaner slices, warm your knife under hot water and wipe dry between cuts. Want to prep ahead? Make the crust and filling a day in advance and decorate right before serving.
- Prep Time: 25 minutes
- Cook Time: 10 minutes
- Category: Dessert
- Method: No-Bake + Baking
- Cuisine: American
Ingredients: What You’ll Need for a Spiderweb Chocolate Tart
Here’s what makes this tart both spooky and sensational. No complicated tools or fancy ingredients just pantry staples and Halloween vibes.
For the crust:
- 1 ½ cups crushed chocolate cookies (like Oreos or graham crackers)
- ¼ cup melted butter
- 2 tablespoons brown sugar
For the filling:
- 1 cup heavy cream
- 200g dark chocolate, chopped
- 1 teaspoon vanilla extract
- 1 tablespoon maple syrup or honey
For the spiderweb design:
- ¼ cup white chocolate chips
- 1 teaspoon coconut oil
Optional toppings:
- Candy spiders
- Pinch of flaky salt
- Halloween-themed sprinkles
Pair it with a side of Cheesecake Banana Pudding Bites for the ultimate October dessert board!
Instructions: How to Make a Spiderweb Chocolate Tart
Let’s break it down step-by-step. This tart comes together fast, making it perfect even for beginner bakers.
Step 1: Make the crust
Preheat your oven to 350°F (175°C). Combine crushed chocolate cookies, melted butter, and brown sugar in a bowl. Press evenly into a 9-inch tart pan. Bake for 8–10 minutes, then let cool completely.
Step 2: Create the filling
Heat the cream in a small saucepan until it just begins to simmer. Pour over the chopped dark chocolate in a bowl. Let sit for 2 minutes, then stir gently until smooth. Add vanilla and maple syrup. Stir again until silky.
Step 3: Assemble the tart
Pour the chocolate filling into the cooled crust. Tap gently to release bubbles. Smooth the top with a spatula and chill in the refrigerator for at least 2 hours or until set.
Step 4: Draw the spiderweb
Melt white chocolate chips with coconut oil. Transfer to a piping bag or zip-top bag with a tiny snip in the corner. Pipe circles from the center outward (like a target). Use a toothpick to draw lines from the center out to the edge, creating the spiderweb effect.
Step 5: Garnish and serve
Top with candy spiders or sprinkles. Slice with a hot knife for clean cuts. Serve chilled.
Looking for another fun Halloween dessert? These Pumpkin S’mores Cookies hit all the same rich notes.
Tips for Success
- Use quality chocolate: Your tart is only as good as your chocolate. Look for 60–70% dark chocolate for a rich, not-too-bitter base.
- Chill before decorating: Make sure the tart is fully set before piping the spiderweb.
- Warm your knife: For clean slices, dip your knife in hot water and wipe dry before each cut.
For more beginner-friendly treats like this one, check out our Easy Chocolate Desserts collection.
Fun Variations
Want to make this tart your own? Here are a few spins that work wonderfully:
- Gluten-Free: Use gluten-free chocolate cookies in the crust. The rest of the tart is naturally gluten-free.
- Streusel Crunch: Sprinkle a cinnamon-pecan streusel on the crust before adding the filling for a fall-inspired crunch.
- Nut Butter Swirl: Add a swirl of peanut butter to the chocolate layer before it sets for a Reese’s-style twist.
- Mini Tartlets: Pour the filling into muffin cups with liners to make Halloween tartlets for a party spread.
Or go fully autumnal with our Apple Pumpkin Streusel Muffins a cozy bake that smells like fall.
How to Store Your Spiderweb Chocolate Tart
- Refrigerator: Store in the fridge for up to 4 days. Cover loosely with foil or plastic wrap.
- Freezer: Yes, you can freeze it! Wrap well and freeze for up to 1 month. Thaw overnight in the fridge.
- Make-ahead tip: Prepare the crust and filling a day ahead, then add the spiderweb design just before serving.
Planning a full fall dessert table? Don’t forget a loaf of Brown Sugar Pumpkin Bread to round out the sweet side of the spread.
Final Thoughts
This Spiderweb Chocolate Tart is the kind of dessert that gets people talking. It’s rich and luscious, but easy enough to pull off on a weeknight. And the spooky spiderweb? That’s just the cherry on top. Whether you’re a seasoned baker or just getting started, this tart invites creativity, comfort, and a little seasonal magic to your kitchen.
FAQs
How do I get a clean spiderweb design?
Use a fine-tipped piping bag or snip a very small corner off a zip-top bag. Pipe evenly spaced circles and drag a toothpick through gently.
Can I use milk chocolate instead?
Yes, but the tart will be much sweeter and softer. Stick with dark chocolate for the best structure and flavor balance.
Can this be made dairy-free?
Yes! Swap the heavy cream for coconut cream and use dairy-free chocolate and white chocolate chips.
What if I don’t have a tart pan?
Use a springform pan or even a pie dish just line it with parchment for easy removal.