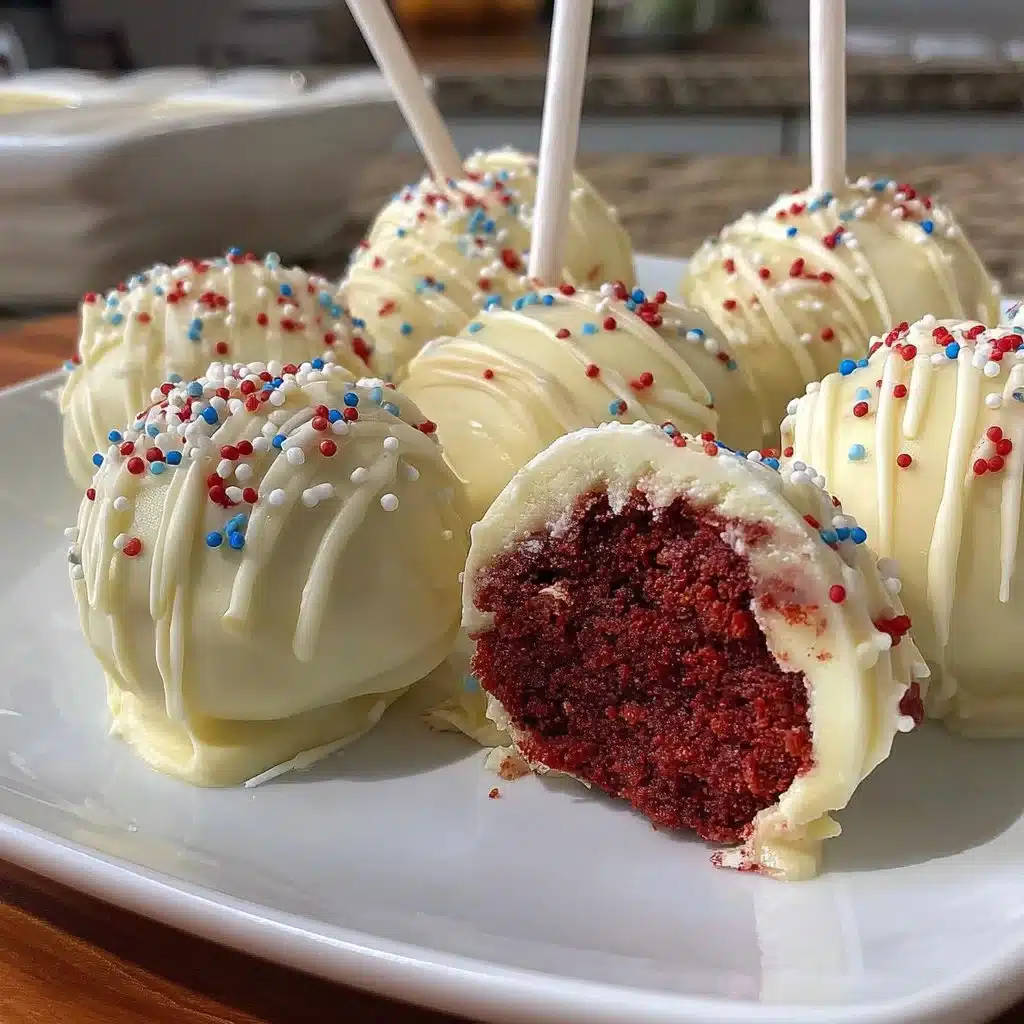
Red Velvet Cake Pops
On a crisp October afternoon, I wrapped my hands around a warm mug and bit into a tiny, velvet-red bite that tasted like fall hugs—this is the story behind why Red Velvet Cake Pops became a reader favorite.
Introduction
There’s something irresistible about Red Velvet Cake Pops: the rich cocoa-tinged cake, the tang of cream cheese frosting, and the playful bite-size presentation that makes them perfect for autumn gatherings, school parties, or an evening by the fire. This recipe is beloved because it transforms simple cake crumbs into elegant little treats that look impressive but are delightfully easy. If you’re trying new seasonal recipes this year, these pops are a cozy, shareable way to celebrate the season, and they pair well with lighter desserts too, like a refreshing 3-ingredient peach sorbet for contrast.
Ingredients
Makes about 30–36 pops
- 1 box red velvet cake (or 4 cups crumbled homemade red velvet cake)
- 8 oz cream cheese, softened
- 1/2 cup unsalted butter, softened
- 3 cups powdered sugar, sifted
- 1 tsp vanilla extract
- 12–16 oz white chocolate or candy melts, for coating
- Red sanding sugar or sprinkles for decoration
- 30–36 lollipop sticks
Note: If you prefer a simpler option, use store-bought cake and frosting to speed things up. For more basic baking ideas, try this easy 4-ingredient banana bread recipe for another beginner-friendly project.
Step-by-step Instructions
- Crumble the cake
- Break the red velvet cake into a large bowl and crumble by hand until there are no large pieces left.
- Make the filling
- In a mixing bowl, beat the cream cheese and butter until smooth. Add vanilla extract and gradually mix in powdered sugar until you have a thick, pipeable frosting.
- Combine into cake batter
- Fold about half of the frosting into the cake crumbs, then add more as needed until the mixture holds together when pressed—aim for a cookie-dough consistency.
- Shape the pops
- Use a tablespoon or small cookie scoop to portion out even amounts. Roll into 1–1.25 inch balls and place on a baking sheet lined with parchment. Chill at least 1 hour, or freeze 15–20 minutes to firm up.
- Insert sticks and dip
- Melt the white chocolate or candy melts in a microwave-safe bowl in 30-second bursts, stirring between each, until smooth. Dip the tip of each stick into the chocolate, insert into a cake ball about halfway, and return to the sheet. Once all sticks are set, dip each pop fully into the coating, tap off excess, and decorate with sanding sugar or sprinkles. Let set upright in a styrofoam block or cake pop stand.
- Serve and enjoy
- Once the coating is firm, your Red Velvet Cake Pops are ready for serving. They’re best at room temperature but can be chilled briefly to firm them up before transport.
Tips for Success
- Chill thoroughly: Cold cake balls hold together better while dipping. If they’re too soft, they’ll fall off the stick.
- Thin your coating: If the melted chocolate is too thick, add a teaspoon of neutral oil or shortening to smooth it—this helps create a glossy finish.
- Work in batches: Dip a few pops at a time so the coating doesn’t harden before you decorate.
- Avoid moisture: Keep pops away from humidity; condensation can make the coating sweat and decorations slide.
For more quick meal inspiration to fuel your baking sessions, check out this simple 3-ingredient sloppy joe recipe.
Possible Variations
- Gluten-free: Swap the cake for a 1:1 gluten-free red velvet cake or use gluten-free cake mix and follow the recipe the same way.
- Streusel topping: Before the coating sets, sprinkle a spiced streusel or crushed graham crackers on top for added crunch and autumn flavor.
- Mini cheesecakes: Mix a bit more cream cheese into the filling for an extra creamy center that mimics cheesecake.
- Chocolate lovers: Use dark chocolate coating and finish with a drizzle of white chocolate for contrast.
For a deeper dive into how cakes differ and whether they’re gluten-free, you might find this guide helpful: are all cakes gluten-free? Everything you need to know.
Storage Recommendations
- Room temperature: Store in an airtight container for up to 2 days at cool room temperature.
- Refrigerator: Keep in a single layer in an airtight container for up to 5 days—allow pops to come to room temperature before serving for the best texture.
- Freezing: Freeze on a tray until solid, then transfer to a freezer-safe container for up to 1 month. Thaw in the fridge, then bring to room temperature before enjoying.
If you’ve got hungry helpers while baking, this hearty 5-ingredient taco soup is a comforting option to serve them while you finish decorating.
Conclusion
These Red Velvet Cake Pops are a seasonal treat that balances comfort and charm—perfect for fall get-togethers, school events, or cozy nights in. If you’d like to see another version of this recipe with step-by-step photos, check out this detailed take on Red Velvet Cake Pops – Brunch With The Brittains to compare techniques and decoration ideas.
FAQs
- How long do Red Velvet Cake Pops last?
- At room temperature, they last about 1–2 days. In the refrigerator, store them in an airtight container for up to 5 days. For longer storage, freeze them for up to a month.
- Can I make cake pops without a mixer?
- Yes. You can mix the cream cheese and butter by hand with a sturdy spatula, though a mixer makes the frosting smoother and quicker.
- Why are my cake pops falling off the stick?
- Usually because the cake balls are too soft or the melted chocolate coating is too cold. Chill the cake balls well and dip the stick tip in chocolate before inserting to act as glue.
- Can I use regular chocolate instead of candy melts?
- Yes. Use high-quality white or dark chocolate and melt it carefully, adding a little neutral oil if it’s too thick. Regular chocolate can be more temperamental but gives a great flavor.

Red Velvet Cake Pops
- Total Time: 1 hour 30 minutes
- Yield: 30-36 pops
- Diet: Vegetarian
Description
Delightful and cozy Red Velvet Cake Pops perfect for autumn gatherings, transforming cake crumbs into elegant, bite-sized treats.
Ingredients
- 1 box red velvet cake (or 4 cups crumbled homemade red velvet cake)
- 8 oz cream cheese, softened
- 1/2 cup unsalted butter, softened
- 3 cups powdered sugar, sifted
- 1 tsp vanilla extract
- 12–16 oz white chocolate or candy melts, for coating
- Red sanding sugar or sprinkles for decoration
- 30–36 lollipop sticks
Instructions
- Crumble the cake into a large bowl and crumble by hand.
- In a mixing bowl, beat the cream cheese and butter until smooth, then add vanilla and mix in powdered sugar.
- Fold half of the frosting into the cake crumbs until the mixture holds together.
- Portion out and roll the mixture into 1–1.25 inch balls, placing them on a lined baking sheet. Chill for at least 1 hour.
- Melt the white chocolate/candy melts in a bowl. Dip the tip of each stick in chocolate, then insert into a cake ball.
- Dip each pop fully into the coating, tap off excess, and decorate. Allow to set upright.
- Serve at room temperature or briefly chill to firm up before serving.
Notes
For best results, chill cake balls before dipping and avoid moisture for a smooth finish.
- Prep Time: 30 minutes
- Cook Time: 1 hour
- Category: Dessert
- Method: Baking
- Cuisine: American