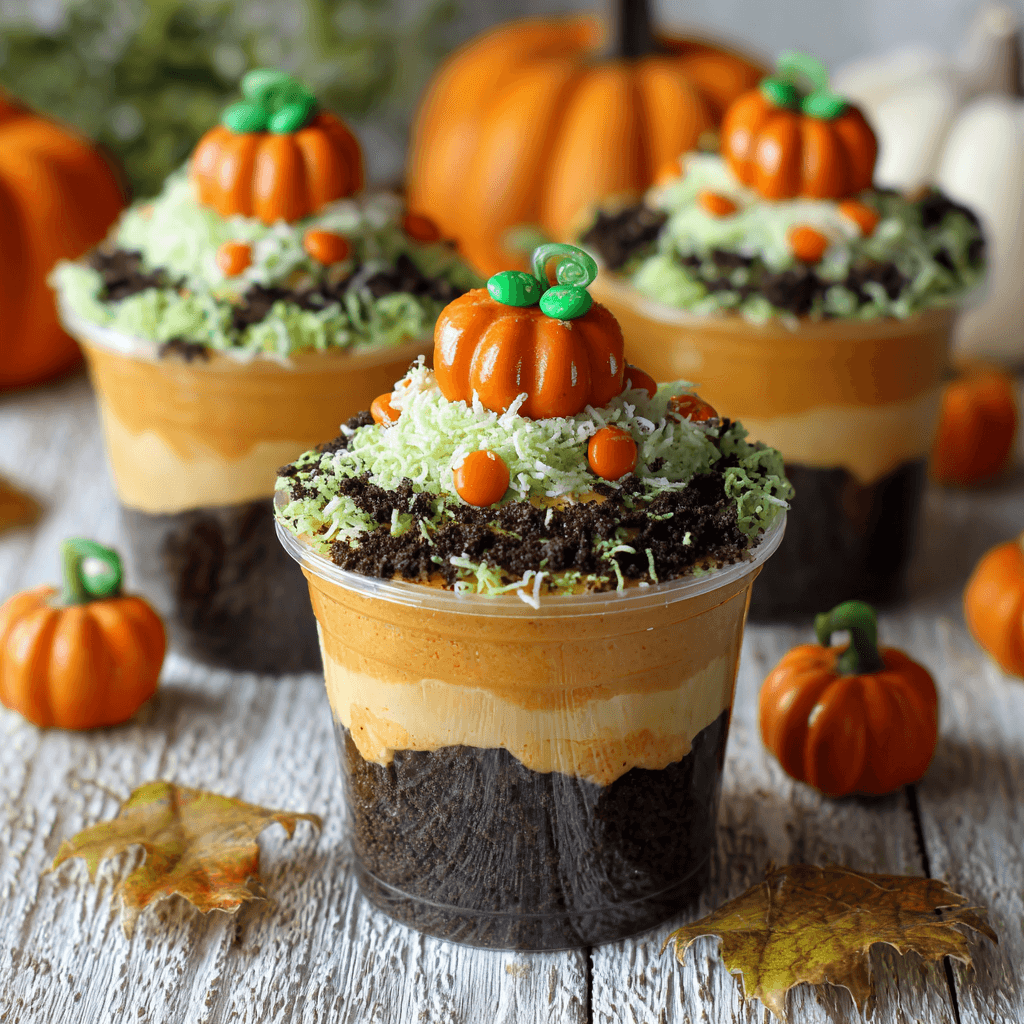
When the air turns crisp and the leaves begin to swirl, there’s something magical about the cozy flavors of fall. That’s exactly what makes these Pumpkin Patch Dirt Pudding Cups so beloved. Imagine creamy layers of pumpkin-spiced pudding, crushed cookie “dirt,” and playful candy pumpkins nestled on top each cup a tiny edible garden that delights kids and adults alike.
Whether you’re planning a Halloween party, a Thanksgiving treat table, or just want a fun afternoon baking project with the kids, these no-bake cups are festive, foolproof, and irresistibly good. Plus, they’re easy to customize (think gluten-free or dairy-free options), making them a go-to dessert throughout the season.
Print
Pumpkin Patch Dirt Pudding Cups
- Total Time: 20 minutes + chilling
- Yield: 8 cups
Description
Festive, no-bake, and full of cozy fall flavor these Pumpkin Patch Dirt Pudding Cups layer creamy pumpkin-spiced pudding with crushed cookie “dirt” and playful candy pumpkins for a fun seasonal treat.
Ingredients
- 1 package (3.4 oz) instant vanilla pudding mix
- 2 cups cold milk
- ½ cup pumpkin purée
- 1 teaspoon pumpkin pie spice
- ¼ teaspoon cinnamon
- ½ teaspoon vanilla extract
- 1 cup whipped topping (store-bought or homemade)
- 20 chocolate sandwich cookies, crushed
- Candy pumpkins or candy corn
- Green-colored shredded coconut (optional, for “grass”)
- Crushed pretzel sticks (for “fences” or decor)
- Optional: gluten-free sandwich cookies, dairy-free whipped topping, plant-based milk
Instructions
- In a large bowl, whisk pudding mix and milk for 2 minutes until thickened.
- Stir in pumpkin purée, pumpkin pie spice, cinnamon, and vanilla.
- Fold in whipped topping until smooth and airy.
- Crush cookies into fine crumbs using a food processor or a rolling pin in a sealed bag.
- In clear cups, layer 2–3 tablespoons of pudding, then a layer of cookie crumbs. Repeat once more.
- Top with candy pumpkins, green-colored coconut for grass, or pretzel stick fences.
- Refrigerate at least 30 minutes before serving for best texture and flavor.
Notes
Use clear cups or jars to show off the fun layers. Chill pudding before assembling for cleaner layers. Let kids decorate with pumpkins and fences—it makes the dessert a fun edible craft. For the freshest look, add decorations right before serving.
- Prep Time: 20 minutes
- Cook Time: 0 minutes
- Category: Dessert
- Method: No-Bake
- Cuisine: American
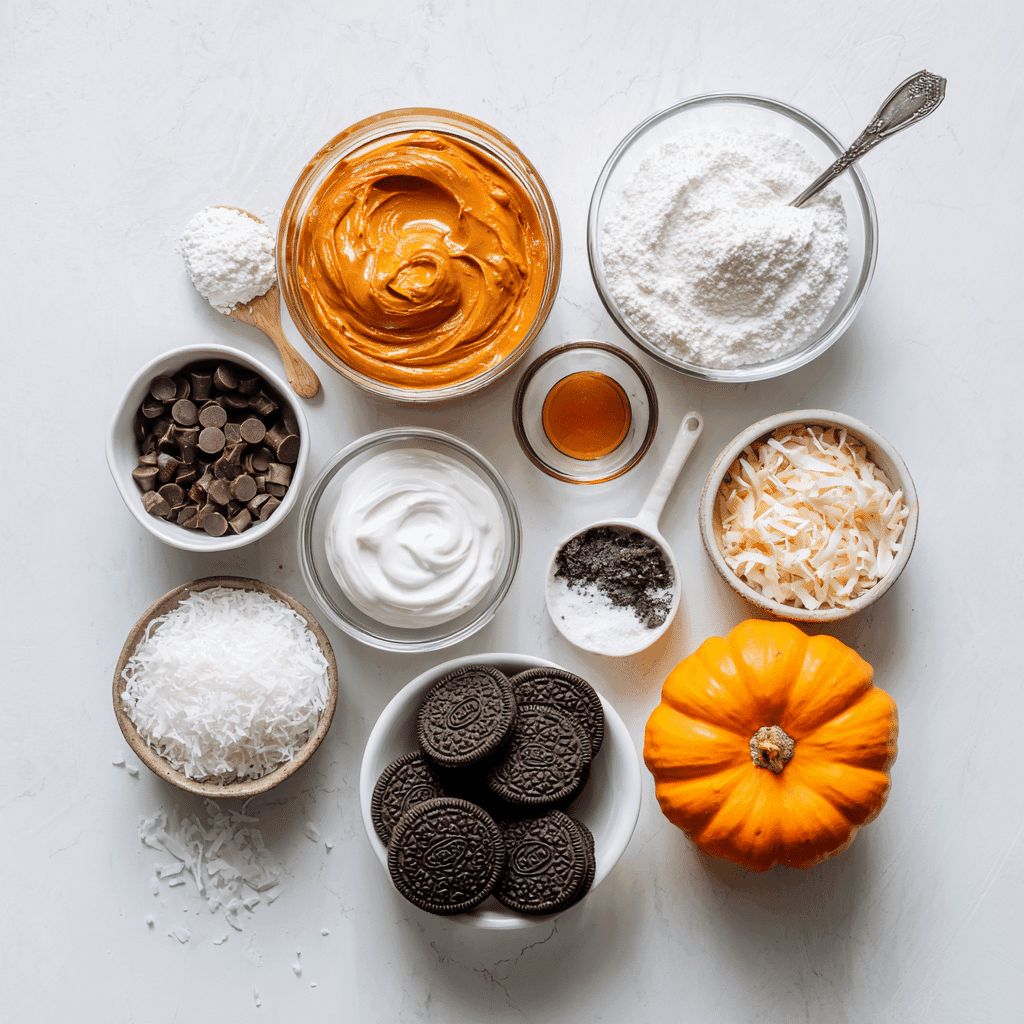
Ingredients for Pumpkin Patch Dirt Pudding Cups
These pudding cups come together in layers rich pudding, cookie “soil,” and fun toppings that bring your pumpkin patch to life.
For the Pudding Layer:
- 1 package (3.4 oz) instant vanilla pudding mix
- 2 cups cold milk
- ½ cup pumpkin purée
- 1 teaspoon pumpkin pie spice
- ¼ teaspoon cinnamon
- ½ teaspoon vanilla extract
- 1 cup whipped topping (store-bought or homemade)
For the Dirt Layer:
- 20 chocolate sandwich cookies, crushed into crumbs (e.g., Oreos or a halal alternative)
Toppings (Pumpkin Patch Decorations):
- Candy pumpkins or candy corn
- Green-colored shredded coconut (optional, for “grass”)
- Crushed pretzel sticks (for “fences” or patch decor)
Optional (for allergy-friendly or lighter options):
- Gluten-free sandwich cookies
- Dairy-free whipped topping and plant-based milk
Craving more fall desserts? Try these pumpkin s’mores cookies or our moist banana chocolate chip pumpkin bread for a flavorful dessert spread.
How to Make Pumpkin Patch Dirt Pudding Cups
1. Make the pudding base:
In a large bowl, whisk the pudding mix and milk for 2 minutes until thickened. Stir in the pumpkin purée, pumpkin pie spice, cinnamon, and vanilla. Fold in the whipped topping gently until smooth and airy.
2. Crush the cookies:
Place the sandwich cookies in a food processor and pulse until fine crumbs form. Alternatively, seal them in a zip-top bag and crush with a rolling pin.
3. Assemble the layers:
In small clear cups or jars, spoon 2–3 tablespoons of pudding into the bottom. Add a layer of cookie crumbs, then repeat once more to create two pudding and dirt layers.
4. Decorate your pumpkin patch:
Top each cup with a candy pumpkin or two. Add green-colored shredded coconut for grass or use pretzel sticks to mimic tiny garden fences. Get creative!
5. Chill and serve:
Refrigerate the cups for at least 30 minutes before serving. They taste even better cold, and the layers set beautifully.
Pair them with cozy sides like cheesecake banana pudding bites or caramel apple puppy chow to wow your guests.
Tips for Perfect Pumpkin Dirt Cups
- Crush cookies finely: A consistent “soil” texture makes layering easier and visually appealing.
- Use clear cups or jars: This lets the pudding and dirt layers shine through.
- Chill before decorating: If you want cleaner layers and firmer texture, refrigerate the pudding for 20 minutes before assembling.
- Get kids involved: Let them add the candy pumpkins or fences it’s a fun edible craft!
Looking for a crowd-pleasing variation? Serve alongside apple pumpkin streusel muffins for a rustic fall dessert table.
Variations to Try
Gluten-Free Option:
Use gluten-free sandwich cookies and check that all toppings are certified gluten-free.
Dairy-Free Version:
Substitute dairy-free milk and whipped topping. Many instant pudding mixes are already dairy-free just read the label.
Extra Crunch:
Add a sprinkle of granola or a streusel topping for texture, inspired by our brown sugar pumpkin loaf.
Pumpkin Spice Boost:
Love spice? Add an extra dash of nutmeg or clove for warmth.
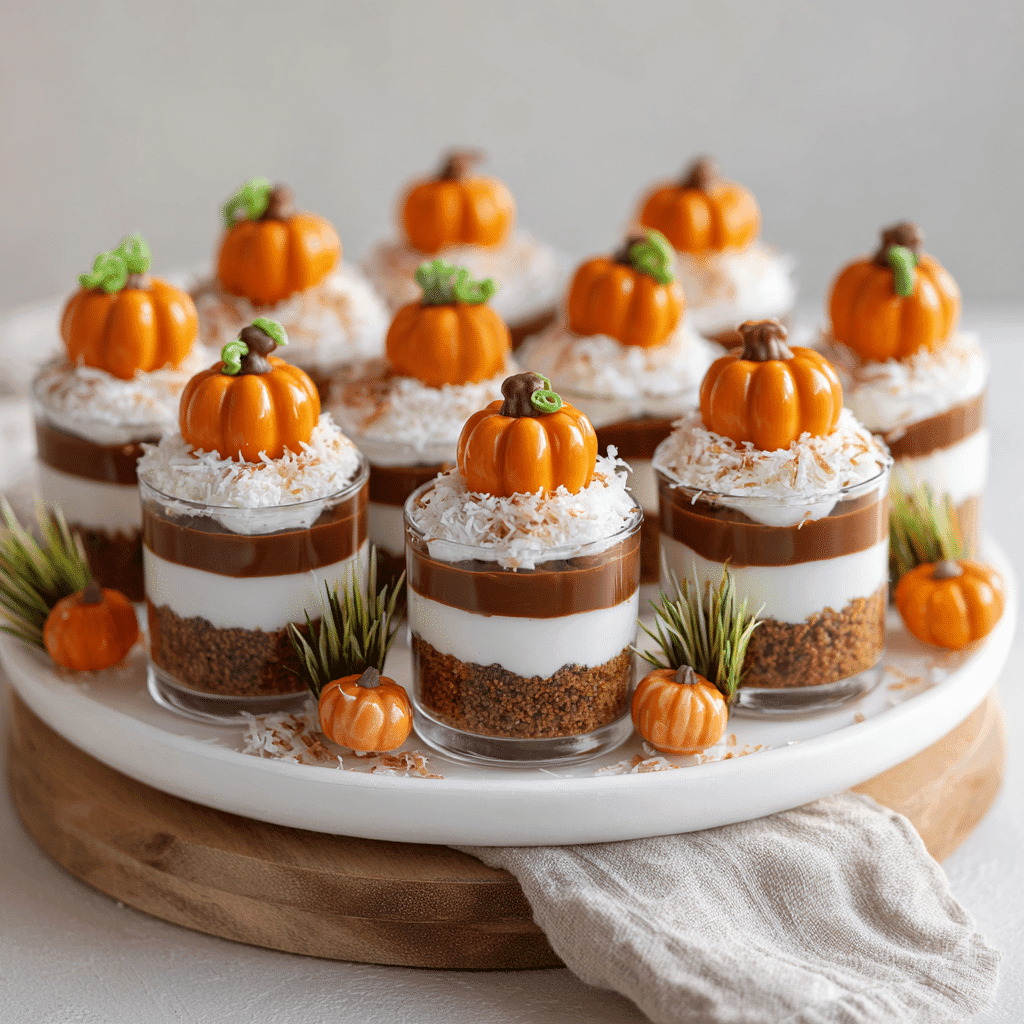
Mini Trifles:
Layer in small mason jars for individual party servings perfect for fall gatherings.
Feeling creative? Use ideas from our sweet sourdough pumpkin bread to inspire deeper flavors in the pudding base.
How to Store Pumpkin Patch Dirt Pudding Cups
Refrigerator:
Keep covered in the fridge for up to 3 days. For best texture, add candy toppings just before serving to avoid softening.
Make-ahead tips:
- Pudding base can be made 1 day ahead.
- Store cookie crumbs separately in a sealed bag.
- Assemble the layers and decorate the day of your event for the freshest look.
You can also refrigerate fully assembled cups, but decorations may lose crispness over time.
Need more fall inspiration? Browse healthy fall desserts that are just as comforting.
FAQs About Pumpkin Patch Dirt Pudding Cups
Can I use chocolate pudding instead of vanilla?
Yes! Chocolate pudding gives it a deeper dirt-like color and pairs well with pumpkin. Just reduce the spice slightly if you want a milder flavor.
Can I make these ahead for a party?
Absolutely. Prepare the pudding and cookie layers the night before. Add decorations the day of for best visual appeal.
What’s the best way to color coconut green?
Mix a few drops of green food coloring with a teaspoon of water, then toss it with shredded coconut in a zip-top bag until evenly coated.
Are these kid-friendly?
Yes both to eat and to make! They’re no-bake, customizable, and fun to decorate. A great Halloween activity.
Final Thoughts
These Pumpkin Patch Dirt Pudding Cups are more than a dessert they’re a moment of joy. With their creamy pumpkin spice filling and crunchy cookie topping, they capture the essence of fall in every spoonful. Whether you’re planning a spooky Halloween bash or a cozy family night in, they’re guaranteed to be a hit.
Looking for more fall flavor? Don’t miss our soft pumpkin bread with cream cheese or banana pumpkin bread combo.
Happy spooning!