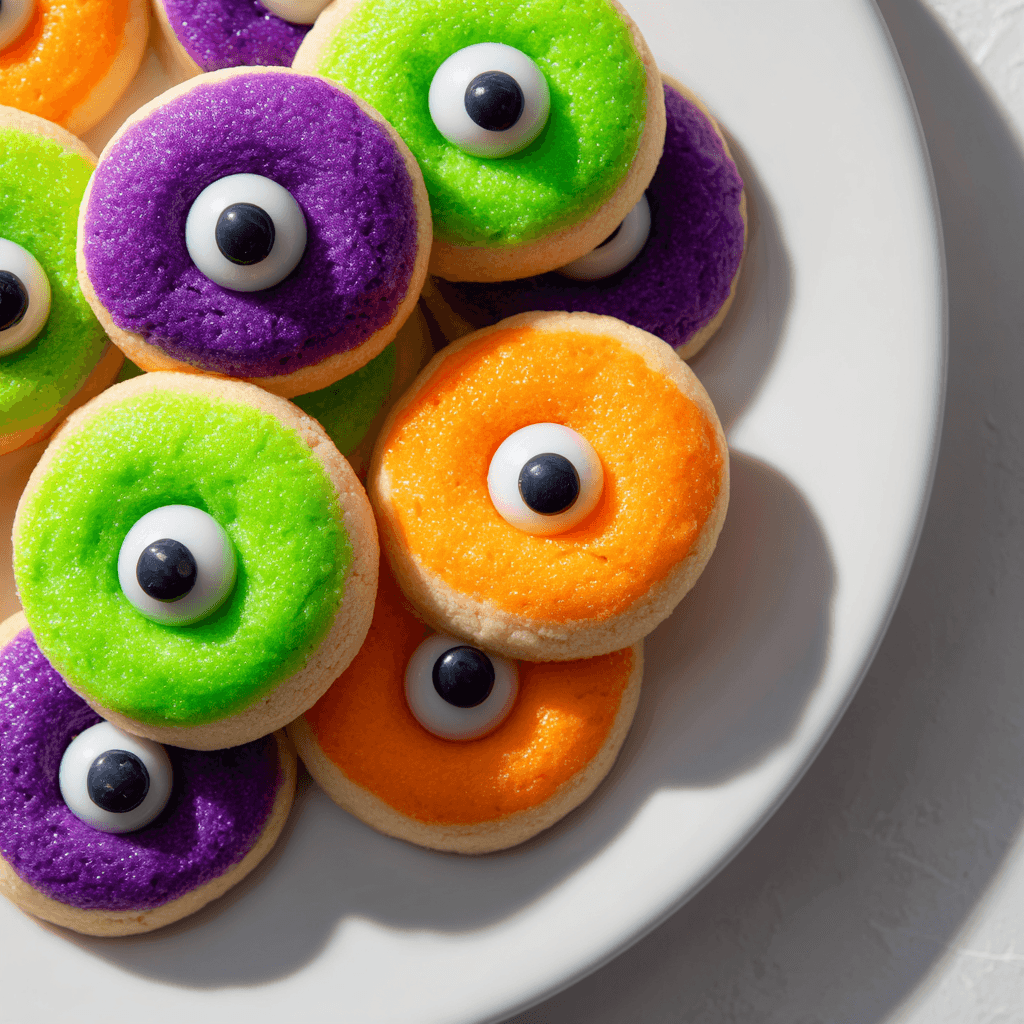
Fall is here, and that means it’s time to break out the cozy sweaters, light your favorite pumpkin candle, and start baking all the sweet, festive things. One recipe that always brings smiles (and a few playful screams) to the table is our Monster Eye Thumbprint Cookies with Candy Centers. These colorful cookies are a Halloween favorite for good reason they’re buttery, chewy, and loaded with personality.
Each cookie is like a mini monster staring back at you with a glossy candy eye. Not only are they fun to look at, but they’re incredibly easy to make with just a few ingredients. Perfect for baking with kids or as a quick party treat, they come together in under an hour and add instant charm to any dessert table.
If you love spooky snacks like Black Cat Waffles with Whipped Cream or Jack O’ Lantern Omelets, this one’s going to be your new favorite!
Print
Monster Eye Thumbprint Cookies with Candy Centers
- Total Time: 33 minutes
- Yield: 24 cookies
- Diet: Vegetarian
Description
Colorful, buttery thumbprint cookies filled with melted candy centers and topped with spooky candy eyeballs. These festive Halloween treats are as fun to make as they are to eat—and perfect for parties, dessert tables, or baking with kids.
Ingredients
- 1 cup unsalted butter, softened
- ¾ cup powdered sugar
- 1 large egg
- 1 teaspoon vanilla extract
- 2 cups all-purpose flour
- ¼ teaspoon salt
- Gel food coloring (orange, green, purple recommended)
- Hard candies (like Jolly Ranchers, unwrapped and separated by color)
- Candy eyeballs (small or large edible sugar eyes)
Instructions
- Preheat oven to 325°F (163°C) and line two baking sheets with parchment paper.
- Cream butter and powdered sugar until light and fluffy (2–3 minutes).
- Beat in egg and vanilla extract until fully combined.
- Stir in flour and salt until dough forms. Do not overmix.
- Divide dough into three parts. Add food coloring to each and mix until fully colored.
- Roll dough into 1-inch balls and place 2 inches apart on baking sheets.
- Use thumb or back of a spoon to press an indent in each dough ball.
- Bake for 8 minutes, remove, and gently re-press the centers if puffed.
- Place one hard candy in each cookie’s center.
- Return to oven and bake another 4–5 minutes until candy is melted and cookies are set.
- While candy is still soft, gently press a candy eyeball into each cookie.
- Let cool completely on the baking sheet before serving.
Notes
Use gel food coloring for vibrant color without changing dough texture. Let cookies cool on tray to prevent cracks in the candy center. Chill dough for 15–30 minutes if you want puffier cookies.
- Prep Time: 20 minutes
- Cook Time: 13 minutes
- Category: Dessert
- Method: Baking
- Cuisine: American
Ingredients for Monster Eye Thumbprint Cookies with Candy Centers
These cookies use basic pantry staples plus a few fun Halloween extras. You can find everything at your local grocery store.
- 1 cup unsalted butter, softened
- ¾ cup powdered sugar
- 1 large egg
- 1 teaspoon vanilla extract
- 2 cups all-purpose flour
- ¼ teaspoon salt
- Gel food coloring (orange, green, purple recommended)
- Hard candies (like Jolly Ranchers, unwrapped and separated by color)
- Candy eyeballs (small or large edible sugar eyes)
Ingredient Tips
- Use gel food coloring for bright results without altering dough texture.
- Choose translucent hard candies they melt cleanly and give that glossy “eye” look.
- Candy eyeballs are usually found in the seasonal baking aisle or online.
Bonus idea: Add some extra flair by pairing these with Caramel Apple Puppy Chow at your Halloween dessert bar.

How to Make Monster Eye Thumbprint Cookies with Candy Centers
This recipe is as much fun to make as it is to eat. Here’s a step-by-step guide:
- Preheat oven to 325°F (163°C) and line two baking sheets with parchment paper.
- Cream butter and powdered sugar in a large mixing bowl until light and fluffy. This usually takes 2–3 minutes with a hand mixer.
- Beat in the egg and vanilla extract until fully combined.
- Stir in flour and salt until the dough forms. Don’t overmix.
- Divide the dough into three equal parts. Add food coloring to each bowl and mix until color is fully incorporated.
- Roll dough into 1-inch balls and space them 2 inches apart on the prepared sheets.
- Use your thumb or back of a teaspoon to gently press an indent in each dough ball.
- Bake for 8 minutes, then remove and gently re-press the centers if they’ve puffed.
- Place one hard candy in the center of each cookie.
- Return cookies to the oven and bake another 4–5 minutes, until the candy is melted and the cookies are just set.
- Remove from oven. While the candy is still soft, gently press a candy eyeball into the center.
- Let cool completely on the baking sheet before serving.
Love themed baking? Check out these Strawberry Shortcake Cheesecake Roll Trifles for a red-and-white holiday twist.
Expert Tips for Perfect Cookies
- Don’t overbake. These cookies are meant to be soft and chewy, not crisp.
- If the thumbprint closes while baking, gently re-indent before adding the candy.
- Let the cookies cool fully on the tray so the candy centers set without cracking.
- Want puffier cookies? Chill the dough for 15–30 minutes before baking.
Looking for more cozy fall ideas? Try our Sweet Sourdough Pumpkin Bread it’s great for weekend baking.
Cookie Variations to Try
These cookies are so easy to customize. Here are a few fun twists:
Gluten-Free Version
Swap the flour with a certified 1:1 gluten-free baking mix. The texture will be slightly more tender but just as delicious.
Chocolate Center
Instead of candy, fill the thumbprint with chocolate ganache or chocolate chips. They’ll melt into a rich center.
Mini Monsters
Use smaller dough balls and mini eyeballs to make bite-sized versions for party platters.
Monster Mix
Color half your dough green and the other half purple, and twist them together to form a two-tone cookie before baking.
Streusel Crunch
Add a light sprinkle of cinnamon streusel on top right after baking for a seasonal twist.
If you’re enjoying the Halloween theme, Pumpkin Bread with Cream Cheese is another reader favorite.
Storage and Make Ahead Tips
- Room Temperature: Store cookies in an airtight container for up to 5 days.
- Freezer Friendly: Freeze the baked cookies (without eyeballs) for up to 2 months. Add eyeballs after thawing.
- Make-Ahead Dough: The cookie dough can be prepped and refrigerated up to 2 days in advance.
Hosting a Halloween party? Serve these alongside Zucchini Bread Recipes or Cheesecake Banana Pudding Bites for a spooky-sweet spread.
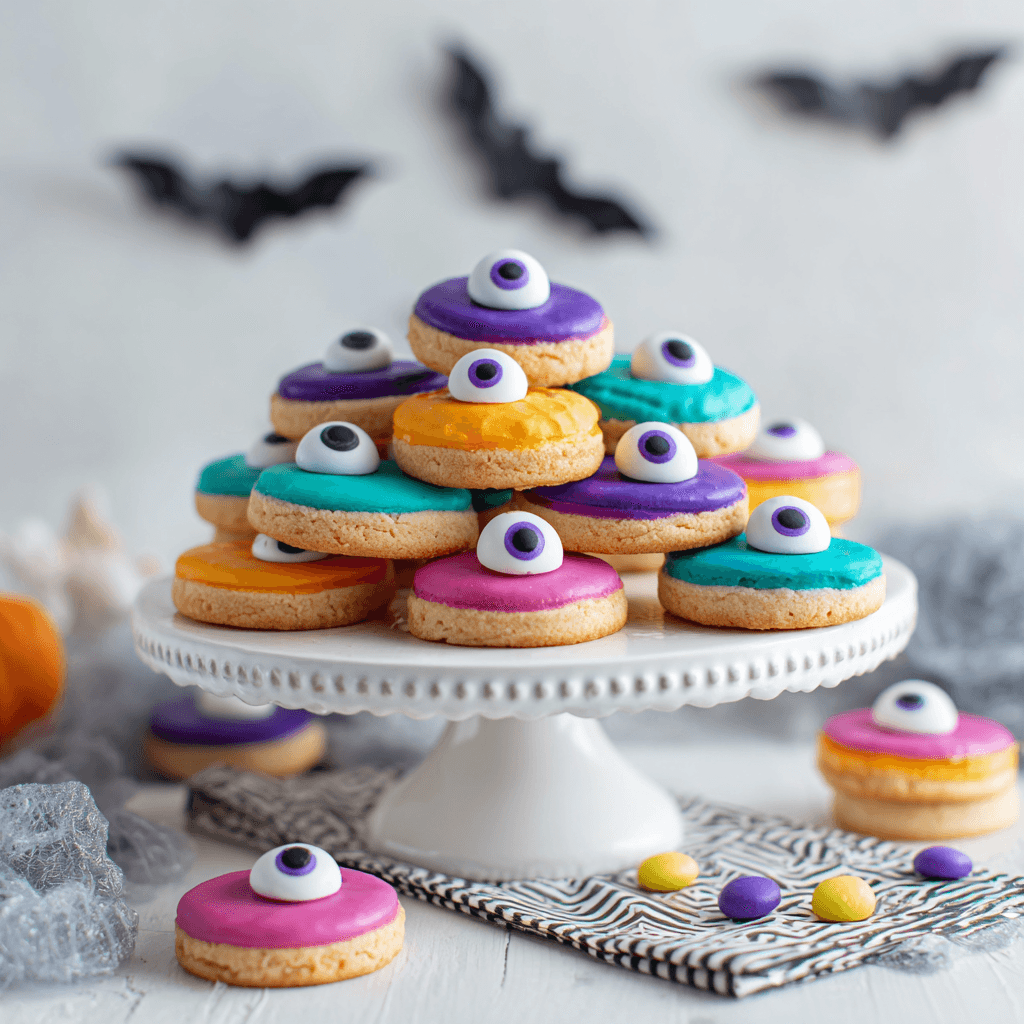
Why Everyone Loves These Cookies
Monster Eye Thumbprint Cookies with Candy Centers check all the Halloween boxes: they’re bright, a little creepy, a lot of fun, and totally delicious. They make kids giggle and adults nostalgic. The combo of buttery cookie, glassy center, and candy eye delivers flavor, fun, and festive charm.
You don’t need to be a pro baker to make these. With simple steps, short prep time, and maximum creativity, they’re the perfect way to kick off spooky season in your kitchen.
Final Thoughts
If you’re looking for an easy, crowd-pleasing Halloween dessert, Monster Eye Thumbprint Cookies with Candy Centers are a winner. They’re playful, colorful, and packed with festive cheer. Whether you’re baking with your little monsters or just treating yourself, you’ll love how these cookies turn out every time.
Don’t forget to tag your creations and share the monster madness. Happy Halloween baking!