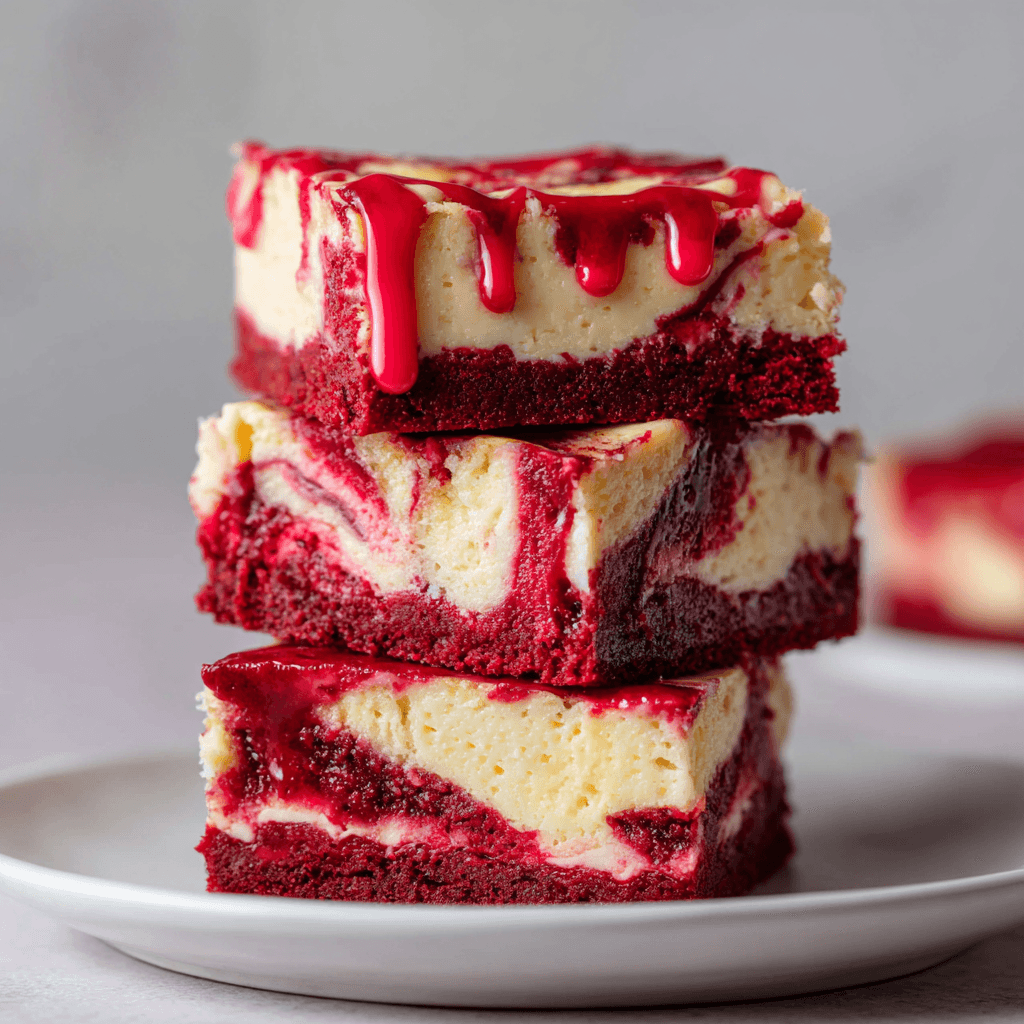
As the days grow shorter and the air turns crisp, there’s something magical about cozying up with a decadent dessert that tastes like the season. That’s exactly why these Bloody Red Velvet Cheesecake Bars have become a reader favorite they’re rich, creamy, and just spooky enough to steal the show at any fall gathering. Whether you’re planning a Halloween party or simply want something dramatic and delicious, these bars bring the drama with bold color and bold flavor. Think soft red velvet cake swirled with tangy cheesecake and a “bloody” raspberry drizzle irresistibly haunting in the best way.
These bars are a seasonal must, right up there with Pumpkin Bread with Cream Cheese and Healthy Pumpkin Oatmeal Bars. But what really makes this recipe special is how easy it is to follow. If you’re a beginner baker, don’t worry we’ll walk you through everything.
Print
Bloody Red Velvet Cheesecake Bars
- Total Time: 55 minutes
- Yield: 9 bars
Description
These Bloody Red Velvet Cheesecake Bars are hauntingly rich, creamy, and perfect for any Halloween table. Swirled with tangy cheesecake and topped with a bloody raspberry drizzle, they’re a spooky-sweet showstopper.
Ingredients
- 1/2 cup unsalted butter, melted
- 1 cup granulated sugar
- 1/4 cup unsweetened cocoa powder
- 1 tablespoon red food coloring
- 1 teaspoon vanilla extract
- 1/4 teaspoon salt
- 1 teaspoon vinegar
- 2 large eggs
- 3/4 cup all-purpose flour
- 250g cream cheese (room temperature)
- 1/4 cup granulated sugar
- 1 large egg
- 1/2 teaspoon vanilla extract
- 1/3 cup raspberry or strawberry preserves
- 1 tablespoon lemon juice (optional)
Instructions
- Preheat oven to 350°F (175°C). Line an 8×8-inch baking dish with parchment paper, leaving overhang for easy lifting.
- In a bowl, whisk melted butter, sugar, cocoa powder, red food coloring, vanilla, and vinegar. Add eggs one at a time, whisking until smooth.
- Fold in flour and salt until just combined.
- Pour 3/4 of the red velvet batter into the pan. Reserve the rest for swirling.
- In another bowl, beat cream cheese and sugar until smooth. Add egg and vanilla; mix until creamy.
- Pour cheesecake mixture over the red velvet layer in the pan.
- Dollop remaining red velvet batter on top. Use a knife or skewer to swirl gently.
- Bake for 30–35 minutes, until edges are set and center slightly jiggly. Cool completely in pan.
- Warm raspberry preserves and stir in lemon juice if using. Drizzle over cooled bars.
- Chill in fridge for at least 1 hour before slicing and serving.
Notes
Use gel red food coloring for bold color. Don’t overmix cheesecake layer. Let bars chill for clean slices. Add edible Halloween toppers or chocolate webs for extra flair.
- Prep Time: 20 minutes
- Cook Time: 35 minutes
- Category: Dessert
- Method: Baking
- Cuisine: American
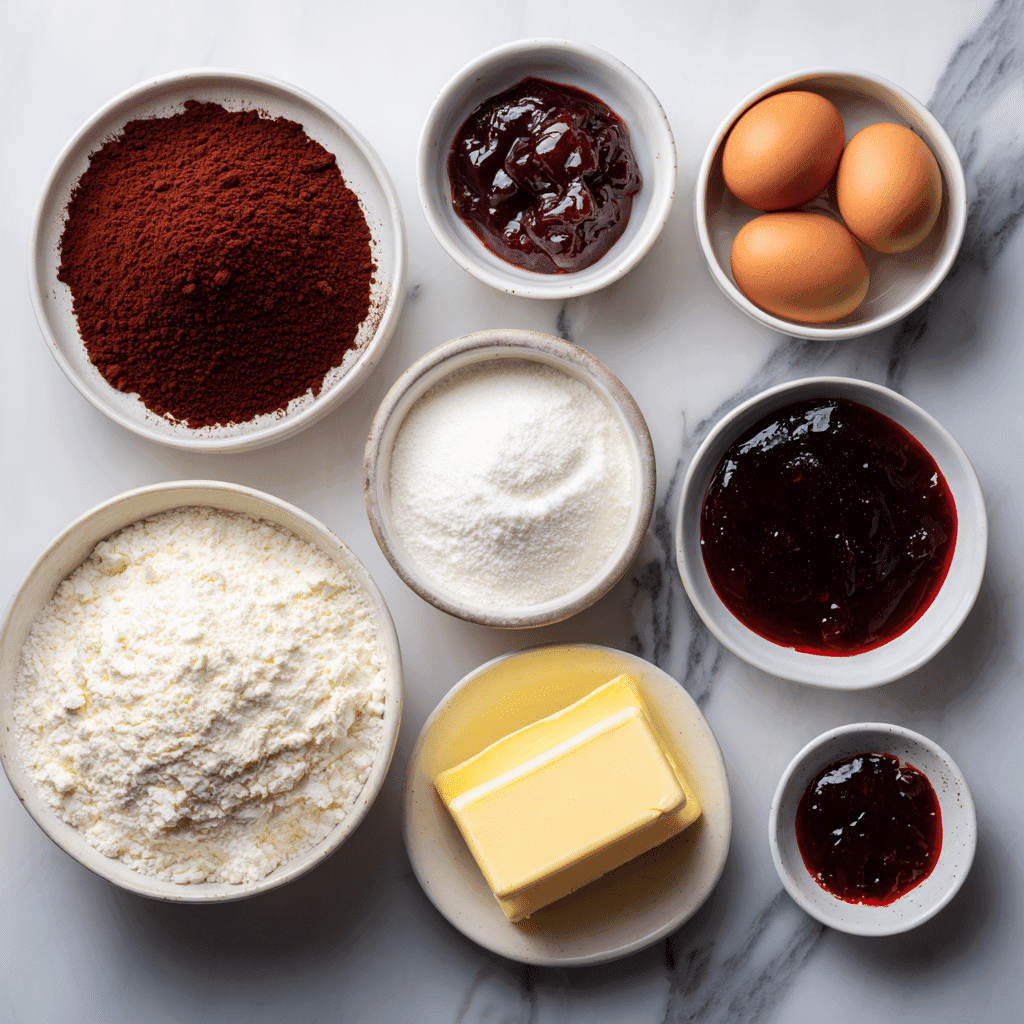
Ingredients You’ll Need
To make these Bloody Red Velvet Cheesecake Bars, you’ll need simple baking staples plus a few bold ingredients to create that vibrant, bloody swirl.
For the Red Velvet Layer:
- 1/2 cup unsalted butter, melted
- 1 cup granulated sugar
- 1/4 cup unsweetened cocoa powder
- 1 tablespoon red food coloring
- 1 teaspoon vanilla extract
- 1/4 teaspoon salt
- 1 teaspoon vinegar
- 2 large eggs
- 3/4 cup all-purpose flour
For the Cheesecake Swirl:
- 250g cream cheese (room temperature)
- 1/4 cup granulated sugar
- 1 large egg
- 1/2 teaspoon vanilla extract
For the “Bloody” Drizzle:
- 1/3 cup raspberry or strawberry preserves
- 1 tablespoon lemon juice (optional for tartness)
Tip: You can also use raspberry coulis or even a thick cherry syrup for a more dramatic effect.
Step by Step Instructions
These bars come together in less than an hour. Here’s how to make your red velvet bars spooky, creamy, and picture-perfect.
Step 1: Prepare Your Pan
Preheat oven to 350°F (175°C). Line an 8×8-inch baking dish with parchment paper, leaving some overhang to make lifting the bars easier later.
Step 2: Make the Red Velvet Batter
In a medium bowl, whisk together melted butter, sugar, cocoa powder, red food coloring, vanilla, and vinegar. Add eggs one at a time and whisk until fully combined. Fold in the flour and salt until just incorporated.
Step 3: Spread and Reserve
Pour about 3/4 of the red velvet batter into the prepared pan. Reserve the rest for swirling.
Step 4: Make the Cheesecake Swirl
In another bowl, beat the cream cheese with sugar until smooth. Add the egg and vanilla extract, and beat until creamy. Pour the cheesecake mixture over the red velvet layer in the pan.
Step 5: Swirl It Up
Dollop the remaining red velvet batter on top of the cheesecake layer. Use a knife or skewer to swirl gently for a marbled look.
Step 6: Bake
Bake for 30–35 minutes or until the edges are set and the center is just slightly jiggly. Cool in the pan completely.
Step 7: Add the Bloody Drizzle
Warm the raspberry preserves slightly and stir in lemon juice if using. Drizzle generously over the cooled bars. Chill in the fridge at least 1 hour before slicing.
Tips for Success
Making the perfect Bloody Red Velvet Cheesecake Bars is all about balance—richness, color, and swirl. Here are a few tips to help:
- Don’t overmix the cheesecake layer too much air can cause cracks.
- Room temperature cream cheese is key for smooth swirls.
- Use a gel-based red food coloring for a vibrant, blood-red hue.
- Chill before slicing for clean, distinct layers.
These bars pair beautifully with a fall latte or warm cider. For more cozy options, try our Apple Pumpkin Streusel Muffins or Banana Chocolate Chip Pumpkin Bread.
Easy Variations
There are a few simple twists you can make to this recipe to suit different dietary needs or occasions.
Gluten-Free Version:
Use a 1:1 gluten-free baking flour in place of all-purpose flour. Make sure your cocoa powder and vanilla extract are certified gluten-free.
Add a Crunchy Streusel Topping:
Sprinkle a brown sugar streusel over the cheesecake layer before baking for extra texture. It adds a sweet, crumbly finish similar to our Cheesecake Banana Pudding Bites.
Make it Festive:
For Halloween, top with edible eyeballs, plastic fangs (for decoration), or pipe dark chocolate webs on top of the drizzle.

Storage and Make Ahead Tips
These bars are a great make-ahead dessert. Here’s how to store them:
- In the Fridge: Store in an airtight container for up to 5 days.
- Freezer-Friendly: Slice and freeze individually wrapped pieces for up to 2 months. Thaw in the fridge overnight.
They’re just as good cold and maybe even better the next day. For another make-ahead option, check out these Strawberry Shortcake Cheesecake Roll Trifle Jars or our indulgent One Pot Salted Caramel Cheesecake.
FAQ: Bloody Red Velvet Cheesecake Bars
Can I use box mix for the red velvet base?
Yes! A boxed red velvet cake mix can work if you’re short on time. Just reduce the liquid slightly so it’s thicker and doesn’t overpower the cheesecake layer.
Can I make this ahead for a party?
Absolutely. These bars hold their shape well and taste even better the next day. Just refrigerate until ready to serve.
What’s the best way to get clean cuts?
Chill the bars completely and wipe your knife clean between each cut. A hot knife helps too.
Can I use a different fruit for the “bloody” topping?
Yes cherry, strawberry, or blackberry preserves all work. Just pick something thick and deep red for that spooky effect.
Conclusion
These Bloody Red Velvet Cheesecake Bars aren’t just a dessert they’re a showstopper. Rich, creamy, and swirled to perfection, they bring flair to any fall table. Easy enough for beginners and impressive enough for a party, they’re sure to become a staple in your seasonal baking.
Want more dessert ideas for spooky season? Try these German Chocolate Whoopie Pies or the fall-favorite Brown Sugar Pumpkin Loaf.